Pro tips for a worry-free installation
We often make the mistake of thinking that installing a wood floor is easy. Because all you need are floorboards and a few nails or some glue to affix the floor to the subfloor… and presto! Right? Wrong. Although the technique may seem rather basic at first glance, some elements can compromise the success of this endeavour, or be a major cause of dissatisfaction.
Here is a list of the main problems caused by a deficient installation, and tips on how to avoid them.
#1 problem : Inadequate relative humidity and temperature
We will never say this enough, wood is a living matter that adapts to the building or house ambient humidity and temperature. Throughout its useful life, a wood floor will go through repeated cycles of absorption and desorption of humidity. These gains and losses in humidity will cause expansion or shrinking, respectively, of the wood’s fiber. When these gains and losses greatly differ from the internal condition of the product when it was produced, it will result in deformations. These deformations are usually reversible but can unfortunately be permanent in some cases.
This is the phenomenon that causes the floor to expand with high humidity and contract with periods of low humidity due to seasonal humidity change. That also means that the wood floor is alive and well! The effects of expansion and contraction are proof of this, as the house dries out during the winter or when indoor heating in on, and then gorges itself with humidity afterwards. Wood is in constant synergy with its environment. It acts like a sponge, absorbing the humidity in the air when it is too high. And when the air is very dry, the wood will release some of its stored humidity. Wood is always striving to be in balance with its environment.
To avoid problems due to improper environmental conditions, it is recommended to maintain a temperature of approximately 68 °F (20 °C ) and 45% relative humidity, even before starting the floor installation. The use of a hygrometer will enable you to monitor and manage the relative humidity of the installation site and to correct it if needed. Why are these levels optimal? Wood floors are made with an internal moisture content between 6 and 9% to be in balance with an environment of 68 °F (20 °C ) and 45 % relative humidity. To keep the floor's internal moisture and dimensions (absorption or shrinking), ambient temperature and relative humidity in the home/building must remain approximately at these levels. The temperature and relative humidity mentioned above are ideal for hardwood floors and woodwork inside a home, as well as for the healthy lungs and skin of the humans who live there. In short, everybody wins!
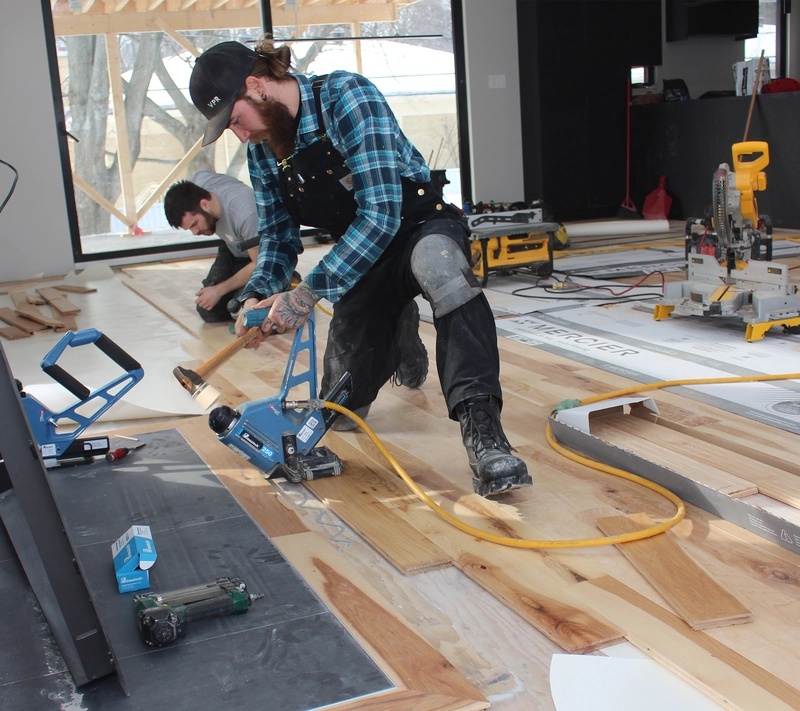
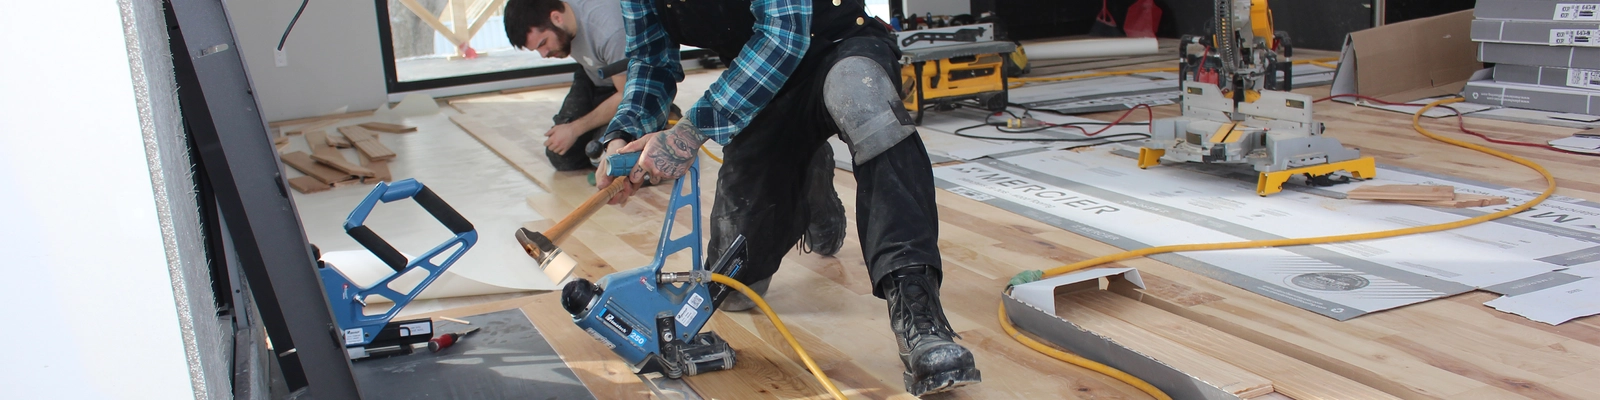
Hardwood floor installation
(Photo credit: Primatech and Construction VPR)
An hygrometer will give a reading of the temperature and relative humidity of the room allowing you to adjust ventilation, hea or dehumidifier if need be.
Among the most frequent problems related to humidity, there is wood cupping. Cupping is defined as a concave deformation where the edges of the floorboards are raised compared to the center. Cupping happens for one reason: Variations in humidity compared to the product’s original state. In the case of a hardwood floor, increased humidity in the air or from the subfloor can lead to this type of deformation of the floorboards. In the case of an engineered floor, cupping can happen when conditions are rather dry. In both cases, these changes can create stress in the wood’s fiber, even leading to delamination (separation of the top layer) in engineered floors. When cupping is present in hardwood and engineered floors, it is important to restore optimal conditions. In most cases, the wood will revert to its original state.
Floor cupping is due to an inadequate level of humidity in the home
(Source: NWFA Problems, causes and cures.)
As the saying goes: Better safe than sorry. Make sure to allow an expansion gap between the wood floor and vertical surfaces such as walls or built-in furniture. This space will give the wood room to expand and avoid problems when humidity rises. The required expansion gap (widthwise for the boards) is equivalent to the thickness of the board. The expansion gap at the end of each row must be approximately 1/4”. The wood expands more widthwise than lengthwise. It is thus important to allow transitions between floor coverings and vertical obstacles. If the wall molding is too thin to allow the required expansion joint, you can cut notches into the drywall. The wood will then be able to expand, invisibly, under the lower wall molding.
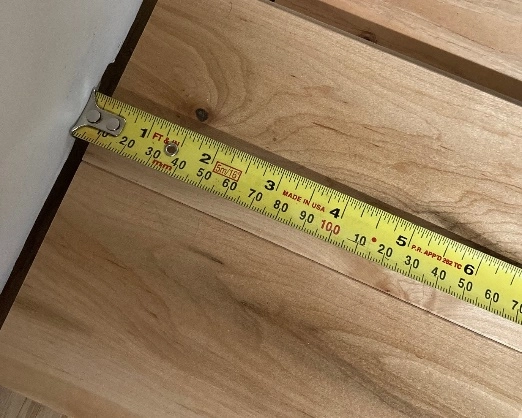
The expansion joint between vertical
obstacles and the end of the rows must be approximately 1/4”.
In second position: A subfloor that does not meet the requirements for installation of a wood floor.
Although the subfloor will be covered and hidden by the wood floor, it can be the source of many problems. First, let us revisit the building code requirements and manufacturer’s recommendations for floor coverings. The Building Code ensures that the building will withstand the mechanical loads that it is subjected to. In other words, this ensures that the piano on the ground floor will not go crashing down to the floor below… However, these building requirements do not consider the conditions for optimal floor covering performance. When installing a solid or engineered floor, requirements regarding levelness, joist spacing, and thickness of the subfloor will ensure that the product is not subjected to vertical loads and significant drops that could compromise its performance. The minimal standard for a plywood or OSB (oriented strand board) subfloor is 3/4” thickness and 19” joist spacing, center-to-center. If the joists are spaced at 16” center-to-center, the plywood subfloor can be 5/8”. A subfloor that does not meet the prescribed requirements can lead to squeaking sounds, or friction of the floorboards when walked upon. In other words, that annoying “squeaky floor”. Hence, the importance of the subfloor.
Which brings us to the third most frequent problem during installation: Squeaking noises
Squeaking, and creaking noises are among the most frequent following the installation of wood flooring, as well as the most difficult to diagnose and correct.
Many parts of the structure and subfloor can be responsible for this. Squeaking sounds come from the movement of the floor when subjected to a vertical force. The floorboards are fixed with mechanical fasteners or adhesive. When this connexion is deficient, the floorboards can move, producing a squeaking sound. A floor that cannot move will not squeak. It is therefore crucial that the recommended subflooring be firmly affixed to the structure, preventing any vertical movement.
Secondly, the floor covering must be affixed with the manufacturer-recommended mechanical fasteners. The use of fixations of the correct length, size, and type (nails or staples) is essential to a successful installation. Spacing between the fixations (nailing pattern) can also vary according to the thickness and width of the floorboards installed. An insufficient number of fixations or too much spacing from the ends of the boards will not ensure good retention and can cause squeaking sounds. In the same sense, a fractured tongue or a fixation with the wrong angle will not ensure good retention. Some floorboards that are more than 5” in width will require mechanical fasteners and adhesive. Make sure to have this information from your wood floor manufacturer before installation.
When the floor is glued to the subfloor, retention is ensured by the quality of the adhesive as well as how it is applied. The key to success is total contact of the board with the subfloor. Using the right trowel, levelness of the concrete slab and using a roller to ensure contact are all important elements. Be careful about how long the adhesive remains in contact with the air. Some products or ambient conditions leave very little time to glue the boards to the floor. The adhesive then becomes less efficient and can cause some the boards to adhere less to the subfloor.
When an acoustic membrane is used, subfloor to membrane adherence and membrane to flooring adherence must be flawless to avoid vertical movement. Finally, choice of membrane is crucial. It must not be easily compressible to prevent any flattening which will lead to the boards to create noise when subjected to a vertical load.
As for the floorboards, they are very rarely the cause of squeaking noises. A word here about the tongue and groove at the ends of the boards and vertical floor movement. The tongue and groove on the boards’ ends do not have anything to do with the floor’s adherence to the subfloor. It is normal for the tongue to be smaller than the groove once assembled. The lateral tongue and groove, paired with adequate fasteners or adhesive is what ensures that the boards remain affixed to the subfloor.
Problem number 4: The floor’s appearance does not live up to the client’s initial expectations
Like any natural material, each wood floor is unique, as well as each of its boards. Upon installation, we suggest that you open more than one box at a time to select boards that look good together.
The cutting loss during installation is estimated at approximately 5% of the surface to be covered. It is better to put the darker-colored boards or the ones with more pronounced character marks aside, to install them in less visible areas such as outer walls, under furniture or inside closets, or simply to distribute them equally for a more harmonious result. The prefinished wood floor industry allows for an up to 5% margin of error for natural imperfections and manufacturing defects/grade selection. Before ordering the quantity of flooring needed, it is crucial to carefully calculate the surface to cover and allow a little more to cover any losses due to cuts, natural imperfections, or manufacturing/grade selection defects.
The same is true for accessories. The stair nosing may have been manufactured from lighter wood than the floorboards where it will be installed. It is thus smart to choose your boards in advance to avoid drastic visual transitions in your floor. These details will prevent many dissatisfactions.
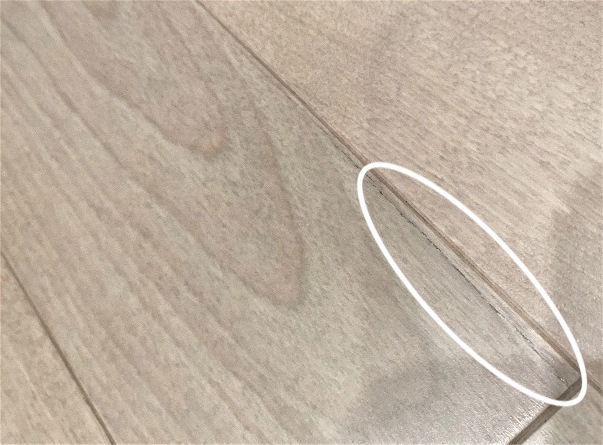
The last problem (but not the least): Splits and checks of the floorboards
This problem has multiple causes that can usually be easily avoided. Let us be clear: It is unrealistic to expect that a wood floor will show no cracks over time. By splits and checks, we mean the small, almost invisible lines, the size of a strand of hair, to the more evident cracks that sometimes require filler. These cracks are part of the wood’s nature and certain species are more prone to them than others.
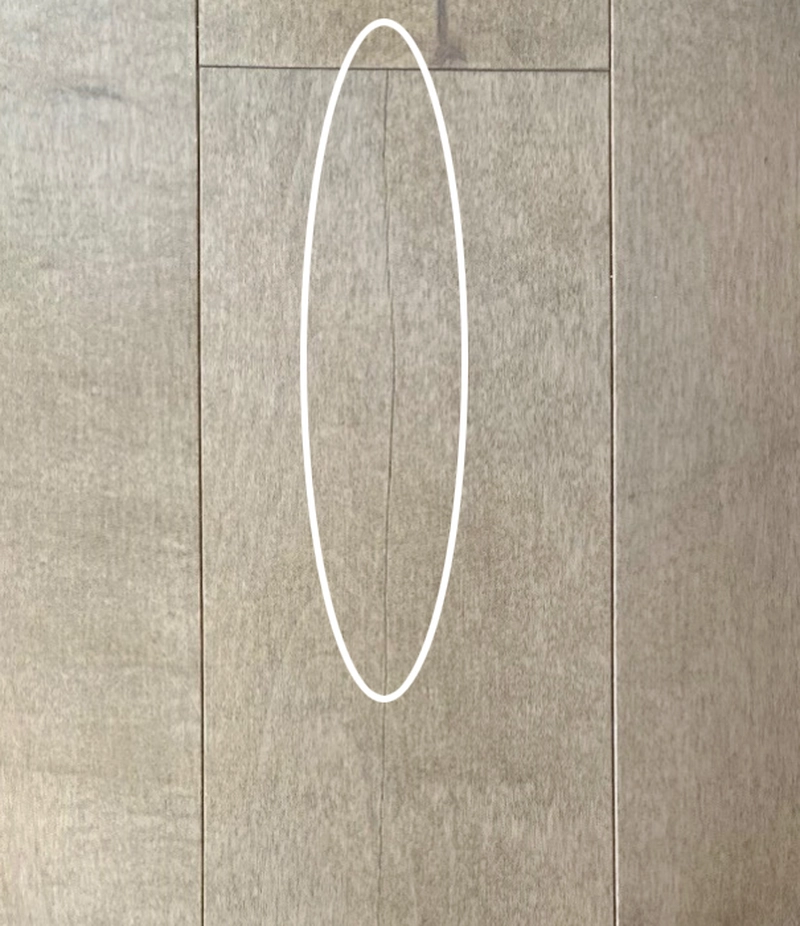
Fine crack on a floorboard.
Some wood floors have more character marks, and already have checking and cracks at the time of installation. Products with more character marks will show more checking and cracks when exposed to fluctuating humidity. If you love wood and its natural look, you must also accept its nature! Adequate control of ambient humidity and allowing for expansion joints during installation will prevent subtle, existing cracks from progressing.
The installation process itself can also create cracks in the wood. Setting the flooring nailer at the wrong pressure, faulty positioning of mechanical fasteners or too much lateral impact when assembling the boards into place can all lead to breakage of the ends and edges.